baby proofed parents

where sane meets baby brain

Subscribe To The BPP Postcard

  • Home
  • About
    • ABOUT KIRSTEN
    • WRITING & MEDIA
    • WORKSHOPS
    • PROFESSIONAL COUNSELING SERVICES
  • PREGNANCY
  • Parenting
  • RELATIONSHIPS
  • WELLNESS
    • ANXIETY
    • DEPRESSION
    • SELF CARE
  • CONTACT
    • WORKSHOPS
    • PROFESSIONAL COUNSELING SERVICES

Italian Spaghetti Squash :: Friday Foodie

July 31, 2014 By: babyproofedparents2 Comments

Italian Spaghetti Squash

Spaghetti squash is a magical vegetable.  The name says it all – when you roast and cut into it, the flesh divides into uniformly sized, al dente spaghetti “noodles”.  If you eat a paleo or gluten-free diet, finding layering base foods for sauces and proteins can be a challenge.  It’s easy to get bored with grilled chicken or steak with veggies, and spaghetti squash is your ticket to a new culinary ride.  I could be imagining this, but it seems the smaller the squash, the smaller the noodles.  I recently roasted a little guy (again with the veggie/male personification…what is that about?) that produced the squash equivalent of angel hair pasta.  This makes me want to squeeze Nature and exclaim, “You’re so CUTE when you’re not chaotically cataclysmic!”

Ingredients:

  • 2 lbs spaghetti squash (1 medium/large squash or 2 small)
  • 2 teaspoons chopped flat leaf parsley or basil
  • 1 tablespoon olive oil
  • 1 tablespoon kosher salt
  • 4 cups Fast Times Marinara or your favorite jarred pasta sauce (c’mon, make your own…you can do it!)
  • 2 cups shredded mozzarella or vegan cheese (see tip below for more on this)

Technique:
Start this recipe early in the day, baking the squash and making the sauce while you’re doing other stuff around the house.  This will allow cool down time, enabling you to work with it and add the other ingredients just before mealtime.  Preheat your oven to 350 degrees, wash the spaghetti squash, and pierce the skin all over (about 10 pokes) with the tip of a small knife to keep it from exploding while it roasts.  Place it on a foil-lined baking sheet, pop it in the oven, and roast for 45 minutes.  When it’s cooled down enough for you to handle, slice it in half length wise, and scoop out and discard the seeds and slimy strands from the middle.  Using a fork, dig into the squash, shred it into noodles and scoop it out into a large mixing bowl.  This is deeply satisfying.  Add the parsley or basil, olive oil and salt (use less if you’re sensitive.  I find that the squash has a slightly sweet flavor, and use extra salt to quell it, increasing savory compatibility) and use two spoons to toss it together.  (You can stop right here.  This makes a treat of a veggie side to go with any meal.)

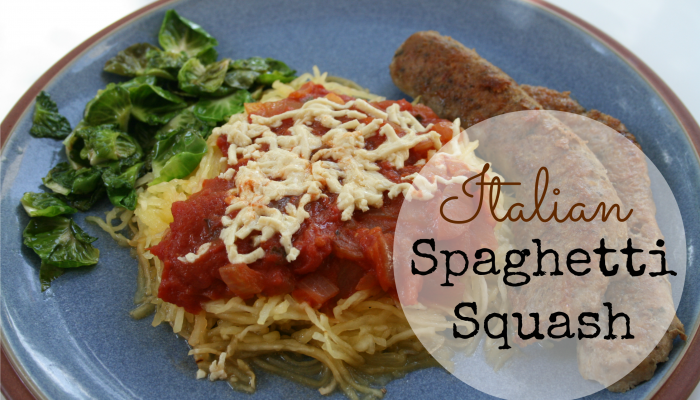
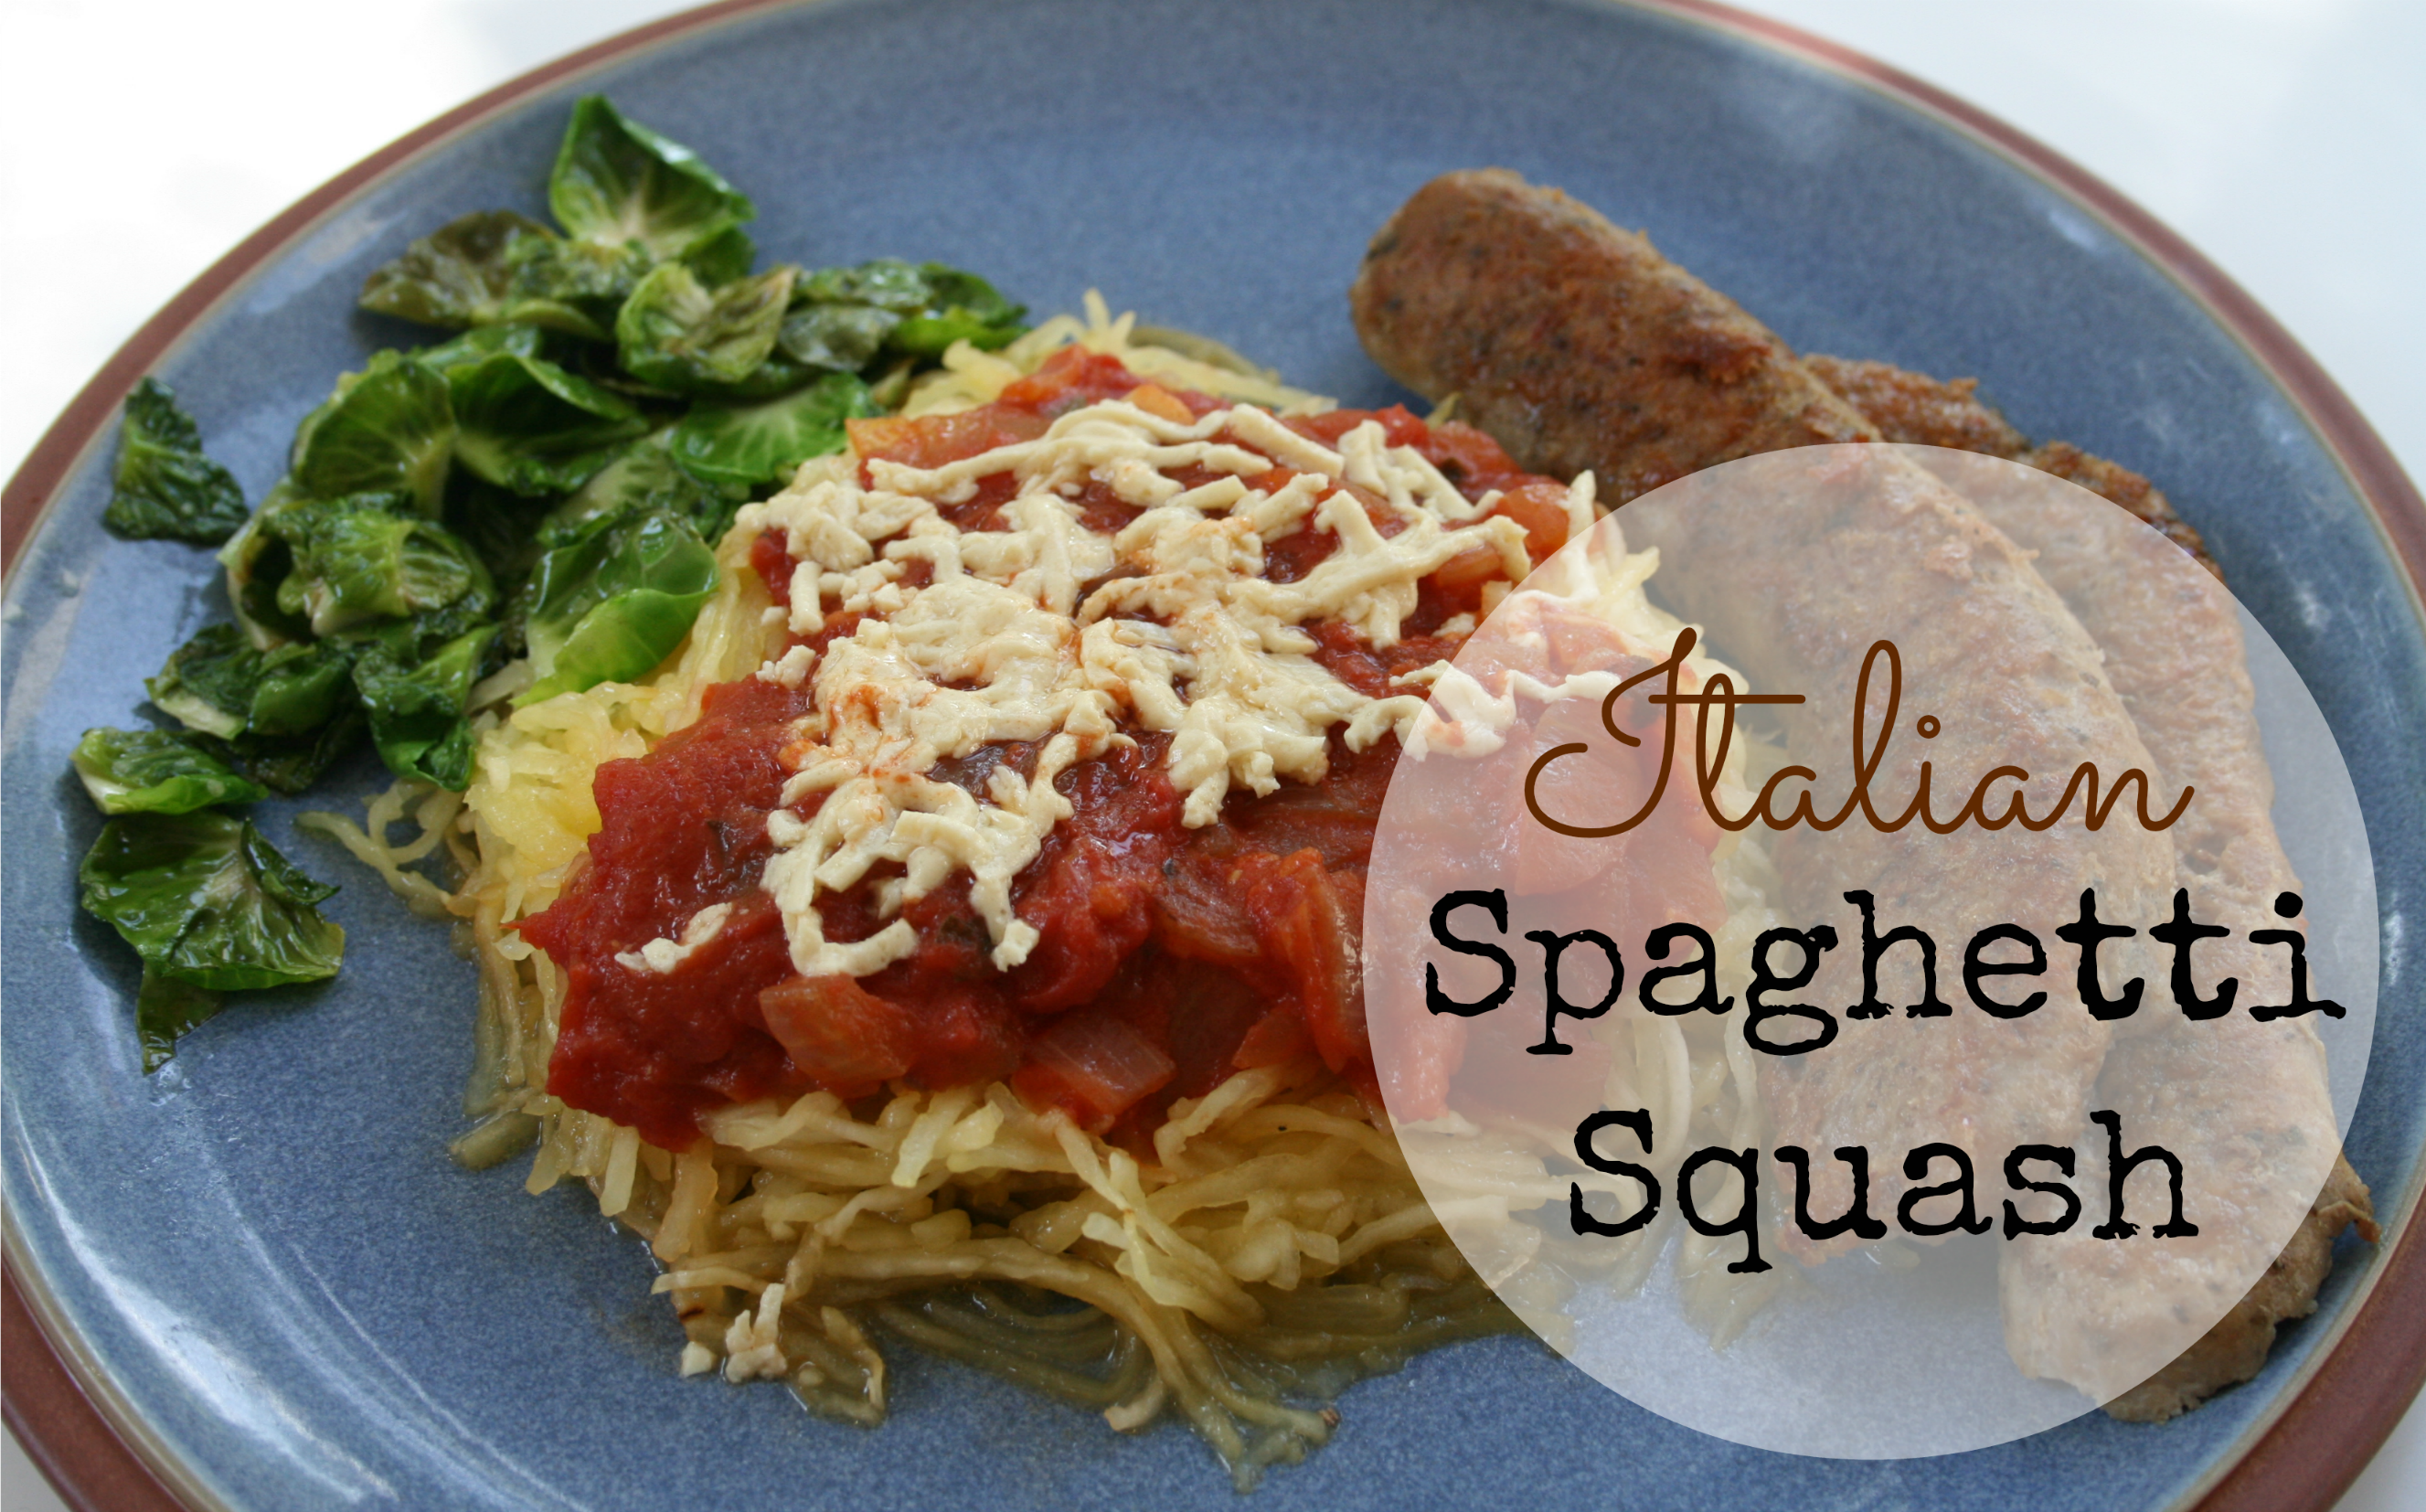
Spread the seasoned squash in a lightly greased rectangular casserole dish, or if you’re feeling fancy, small individual serving casserole dishes.  Top it with the marinara, the cheese, and the protein of your choice (see ideas below).  Pop the casserole back into the oven and bake until the cheese melts and the whole deal is hot and bubbly, about 20-30 minutes.  The squash produces a lot of liquid, so use a slotted spatula to drain a little off as you serve it.  And then eat it.  And then smile.

Cheryl’s Tips:
Daiya vegan cheese is delicious.  It melts perfectly, and has a lovely cheesy flavor with no weirdo ingredients.  We try to avoid dairy, and this product has enabled us to make enchiladas, quesadillas, pizza, etc. without missing real cheese at all.  I buy 5 bags of our favorite (the mozzarella shreds) at a time, keeping one bag in the fridge and the rest in the freezer until I’m ready for them.

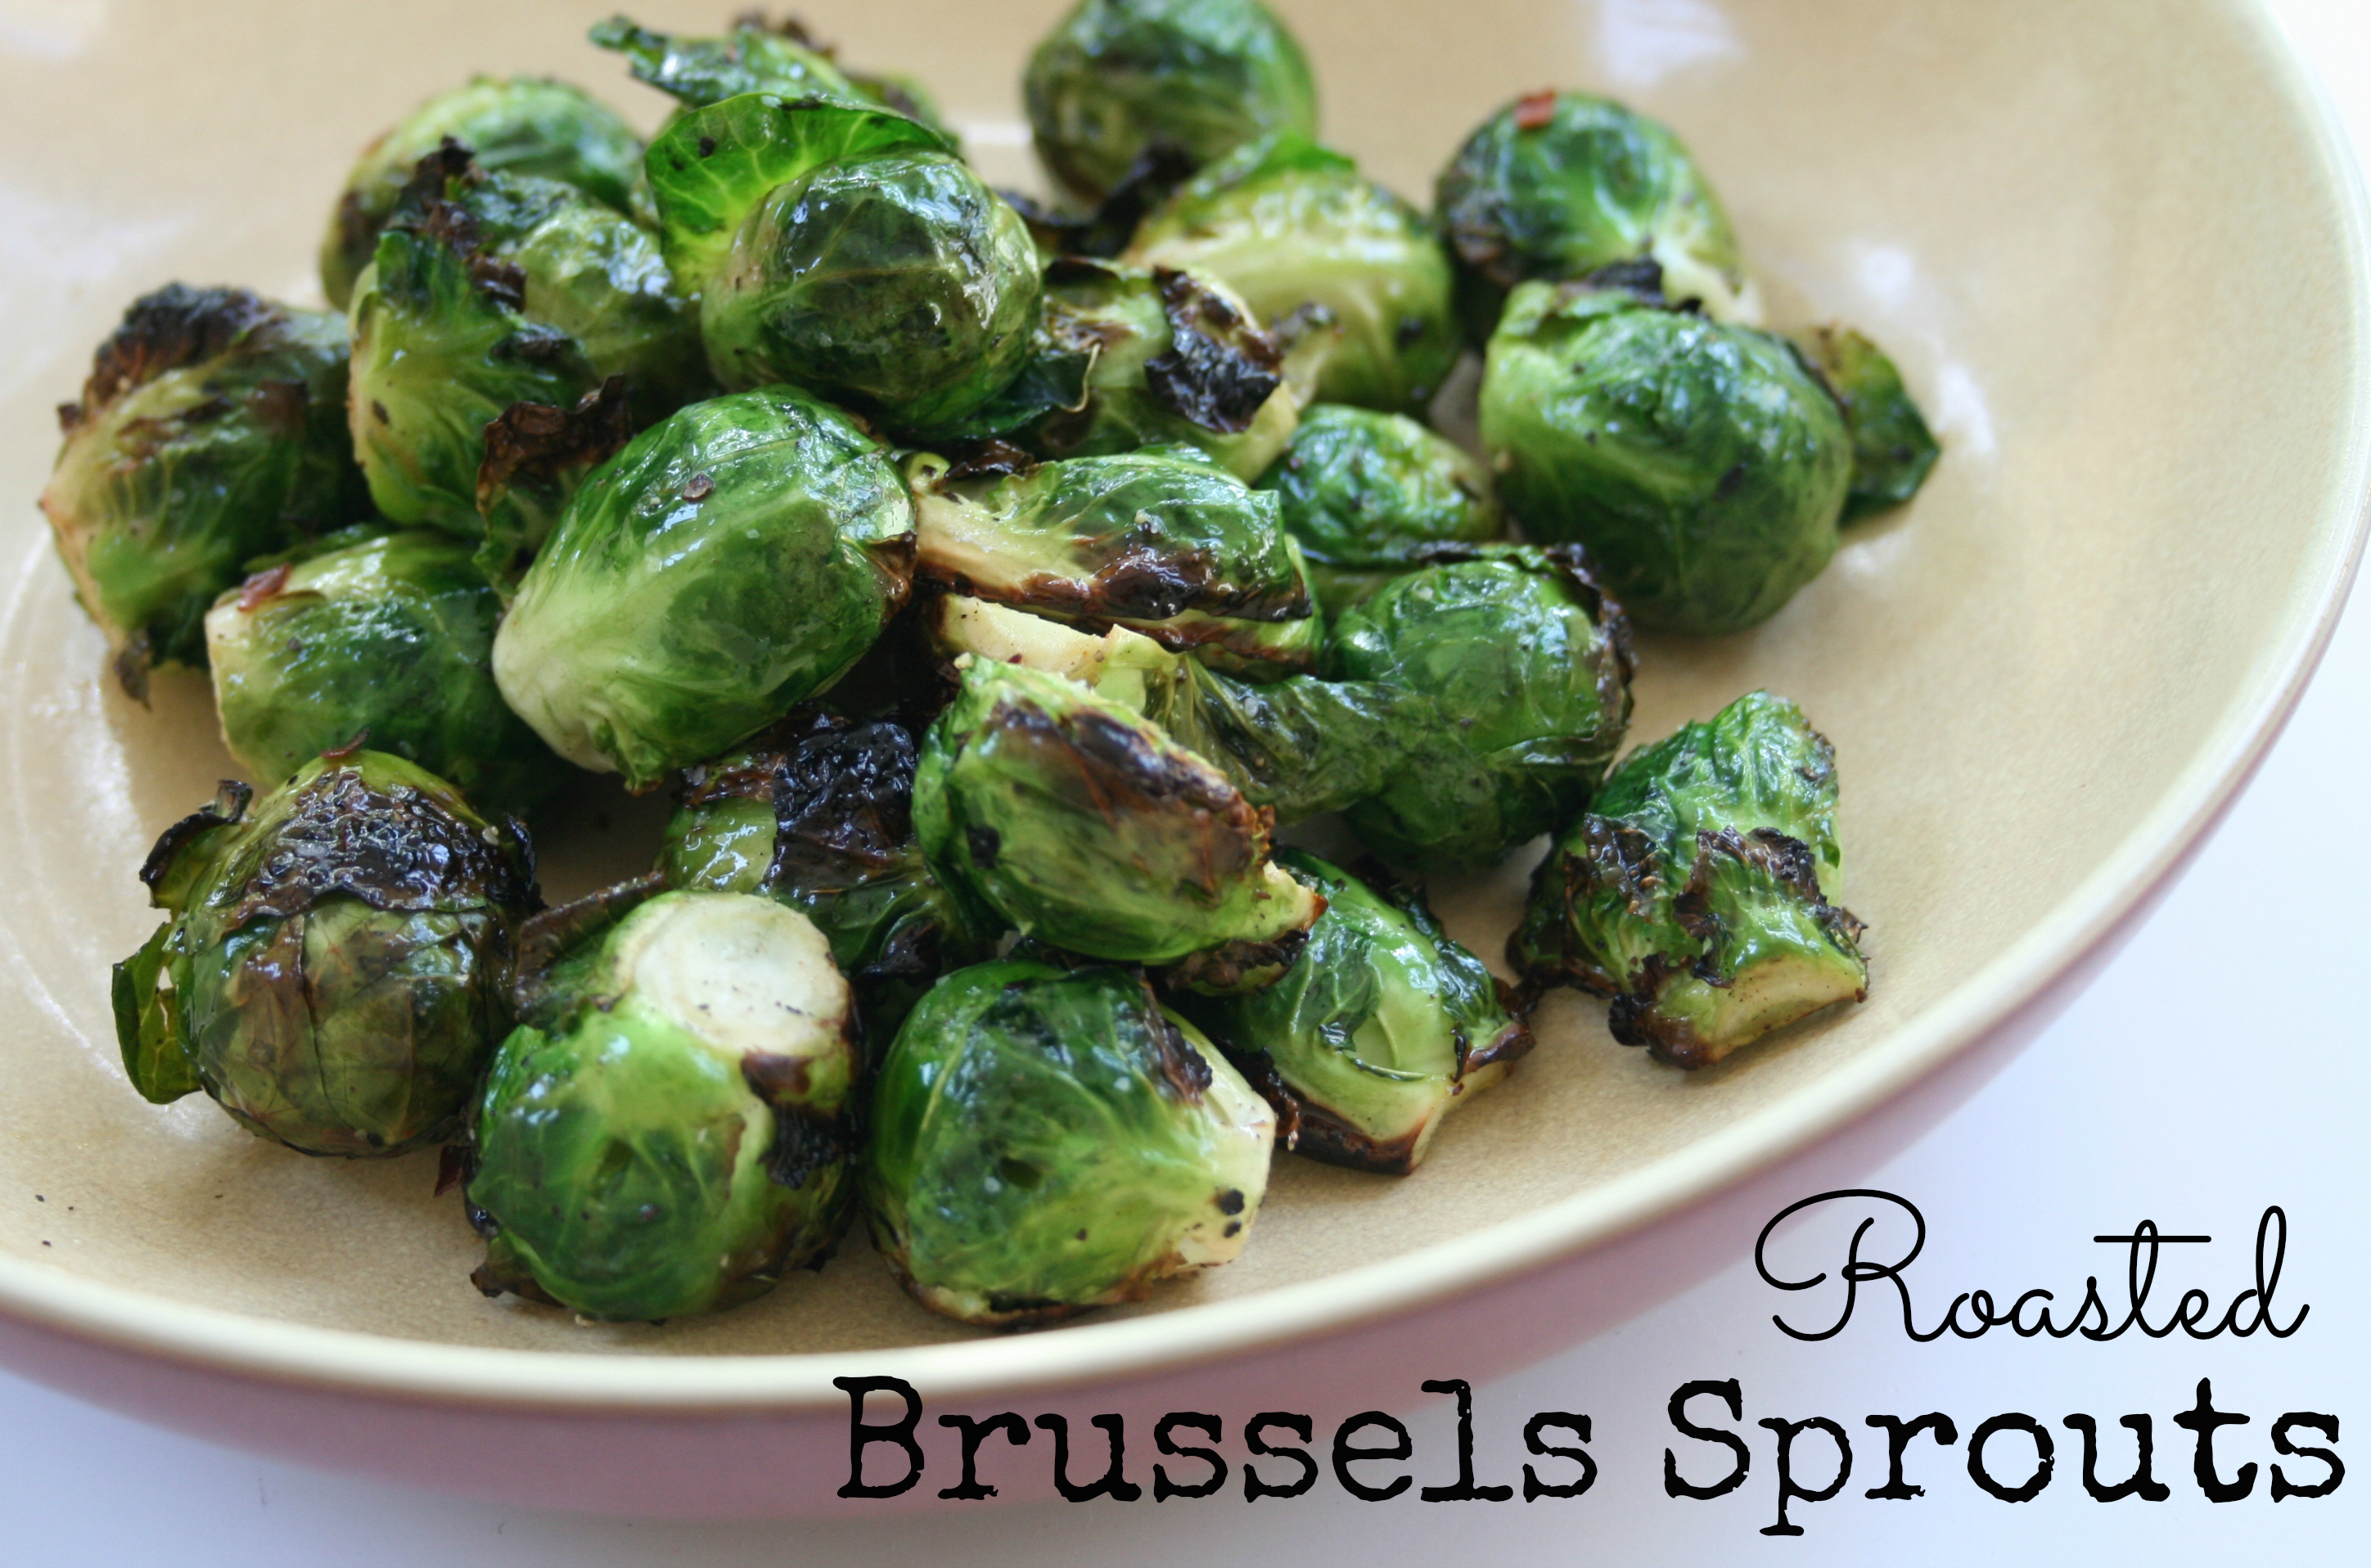
I photographed the squash alongside a link of chicken Italian sausage, casing removed, sliced lengthwise and cooked over medium heat until golden and cooked through (about 5 minutes per side).  Other protein adds: you can throw a handful of walnuts or some browned bison on top of the cheese before the final baking step.  I often add a fried egg to the baked squash with swoon-worthy results.  Also in the photo – I grilled Brussels sprouts and gathered up all the little leaves that fell off as I skewered them.  I sautéed the leaves in a skillet over medium-high heat in a teaspoon of olive oil until they were soft and browned, then sprinkled them with a little kosher salt.  Delightful.

If you listen to “Blow (Cirkut Remix)” by Ke$ha and take dance breaks with your kids while you’re cooking, your food will be infused with awesomeness.

Here’s to Sanity and Chaos,

Cheryl

5_MG_0872

Roasted Brussels Sprouts :: Friday Foodie

July 25, 2014 By: babyproofedparentscomment

Brussels Sprouts

I have a few grievances about the past.  I’m well on my way to letting go of most of them; you know, living in “the now” and all.  But one that is especially difficult to reconcile:  I’ve only been eating Brussels sprouts for a year.  As a kid, Brussels sprouts were the go-to vegetable for instant “ewww, gross” ignorance.  The veggie scapegoat – like the teenager who acts out and then gets all the blame for family-wide, rampant dysfunction.  All this time, sprouts were so deliciously perfect, and I never knew.  We have a lot of catching up to do.

Ingredients:

  • 1 bag or 1 “tree” Brussels sprouts
  • 2 tablespoons olive oil
  • 2 heaping teaspoons kosher salt
  • 1/2 teaspoon freshly ground black pepper
  • 1/4 teaspoon red chili flakes (optional – don’t use if your family has heat sensitivity)
  • 1/2 lemon

Technique:
Preheat your oven to 450 degrees.  Heat a tea kettle or microwave a large glass pitcher of water to boiling.  If you bought your sprouts still on the stalk or the “tree” as I like to call it, simply break them off.  Cut the larger sprouts in half, and leave the smaller ones whole.  Wash them, and place them in a metal colander in your sink. Pour the boiling water over the sprouts, and watch them go from camo to beautiful, bright green (this is an easy version of “blanching”, which is a preparation step for roasting dense vegetables – it makes a huge difference in the outcome).  Rinse them with cold tap water (this stops the impact of the hot water, preventing a heart-breaking mushy texture), and then dry them on a clean dish towel (this helps them brown evenly).  In a large bowl, stir the sprouts, olive oil, salt, pepper and chili flakes together.  Line a large, rimmed baking sheet with aluminum foil, and spread the sprouts evenly over the pan.  Roast in the oven for 25 minutes.  Remove from the oven, squeeze the lemon half over the sprouts and use a spatula to give them a good final stir.  Look at that.  Some of the sprouts will be dark, golden brown – those are the best.  The flavor of the little leaves that fell off the sprouts and almost got charred in the oven?  An angel was whittling a pegasus out of heaven-wood, and some shavings fell into your mouth.

Cheryl’s Tips:
Sprouts reheat deliciously.  If you have leftovers, grind them in your food processor, adding a 1/2 cup to pasta sauce for extra veggie-carbs.

Throw them on the grill to add a layer of smokiness – follow the recipe, but instead of using your oven, slide the prepared sprouts onto metal skewers (if you used the red chili flakes, wear gloves to avoid burning your fingers), and grill them over hot coals on one side for 3-4 minutes, then use tongs to flip them, grilling the other side for an another 3-4 minutes.  Don’t worry if they blacken a little – they’ll taste amazing.  Grilling produces a crunchier texture.  If you want them softer, move them to the edge of your grill off the direct heat of the coals, and let them cook about 5-10 minutes longer.  Don’t forget the lemon juice at the end.

Another tip?  Be kind to yourself in the kitchen.  Don’t say things like, “I suck at cooking,” because it’s not true and can become a self-fulfilling prophecy.  Remind yourself that the biggest reason you’re cooking is to improve health for yourself and your family, which is a form of love.  And love makes things taste so f’ing good.

Here’s To Sanity and Whittling,

Cheryl

Braised Collard Greens with Olive Oil Breadcrumbs :: Friday Foodie

March 13, 2014 By: babyproofedparentscomment

braisedcollards

Okay.  I’ll be straight with you… my kids become mildly offended when I serve greens to them, rendering this recipe slightly less than family “friendly”.  But, as you’re gathering, BPP is all about self-care, which carries over to how your kids see you taking care of your own body, and the resulting impression on them. There are lots of suggestions out there on getting veggies into your child’s diet. My two approaches are to purée and hide them (more on that in the Cheryl’s Tips section below), or to give them a healthy serving, and when they protest, announce, “Mister Collard just wants to sit on your plate.” (Aside: why do I always refer to veggies in the masculine? I’ll have to analyze that.) Bottom line, these buttery-textured greens are delicious and incredibly good for you.

Ingredients:

For the Breadcrumbs:

  • 2 slices thick bread (gluten-free if you’re into it), coarsely crumbled
  • 2 tablespoons olive oil
  • 1/4 teaspoon kosher salt
  • 1/8 teaspoon freshly ground pepper

For the Greens:

  • 4 bunches collard greens, washed and sliced across the width in 1 inch strips, discarding the thick bottom stems (this will seem like a ton when you’re buying them, but trust me, they reduce dramatically when they cook, and you will want left-overs!)
  • 1 cup chicken or veggie stock
  • 2 heaping tablespoons coconut oil
  • 1 tablespoon kosher salt (I like my food highly seasoned, use less salt if you are sensitive to it)

Technique:

The Breadcrumbs:  Preheat your oven to 350 degrees.  In a small bowl, stir the breadcrumbs with the olive oil, salt and pepper, and spread on a small baking sheet.  Toast in the oven for about 10 minutes or until golden brown and crunchy.

The Greens:  Place the greens in a in a large dutch oven (you might have to stuff them down).  Pour in the stock and add the salt and coconut oil (don’t worry if it’s still in a solid form – it will melt fast).  Don’t bother stirring yet – too much going on in that pot.  Cover with a heavy lid, and place over medium high heat.  Check every couple of minutes until the liquid starts to boil. Using tongs, carefully stir the greens together until they are all coated with the liquid and have started to reduce in mass.  Replace the lid, and allow the greens to cook at a boil for about 5 minutes.  Reduce the heat to low, and let them simmer an additional 10 minutes (less time if you like your veggies on the firmer side, more time if you like softer.  I used the cooking time for my preference, slightly firm in texture, but a little soft without being squishy or slimy).  The greens will have gone from a bright shamrock to a slightly darker camo green.  Turn off the heat and remove the lid to stop the steaming.  Top each serving with a couple of tablespoons of breadcrumbs and enjoy!

Cheryl’s Tips:

This technique works well with a variety of greens: kale, mustard, Swiss chard, etc.  Simply adjust the cooking time to make sure the resulting texture is to your liking. Collards are my favorite, because they aren’t bitter, and their rich texture is heavenly.  Make the greens a complete meal by topping a bowl of them with tofu, a fried egg, or a few Mandy’s Meatballs.

I love my mini chopper. It’s the perfect, easy-to-clean size for puréeing small servings of veggies to stir into an already kid-approved pasta sauce or meatball recipe.  I usually mix about 1/2 cup of the puréed greens into 2 cups of pasta sauce, then toss with 4 cups of cooked pasta.  If you have extra purée, you can freeze it in ice cube trays for future use.  If you’re interested in making your own baby food, check out Super Baby Food – full of easy recipes for your little ones, plus a handy chart outlining what foods are safe to try at what ages.

Here’s to Greens and Sanity,

Cheryl

5_MG_0872

Connect with BPP

Search The BPP Blog

Online resource for new and expectant parents

Welcome to BPP, an online resource for maintaining your sanity – before, during and after your baby's arrival. I'm Kirsten Brunner and I'm here to support YOU. Read more...

Parenting tips and advice
I'm Published by Mamalode!
TODAY.com Parenting Team Parenting Contributor

Tags

anger anxiety baby birth partner breakfast childbirth co-parenting communication conflict coparenting couple's communication crying dad depression dinner divorce doula easy recipe foodie friends gluten-free healthy hospital kid-friendly labor & delivery laughter love marital marriage newborn parenting postpartum pregnancy prenatal relationship sanity self care sides single parent strength stress stress mgt tantrums tip veggies

Learn About Our Professional Counseling Services

Learn About Our Professional Counseling Services

Pre-Order My Book

Pre-Order My Book

Our Partners

Our Partners

Recognition

Recognition
The Land of Nod, design for kids and people that used to be kids
Tiny Prints - Holiday Offer

For Parents of Multiples

How Do You Do It?

Monthly Archive

The Land of Nod, design for kids and people that used to be kids

Copyright © 2025 · Modern Blogger Pro Theme By, Pretty Darn Cute Design