baby proofed parents

where sane meets baby brain

Subscribe To The BPP Postcard

  • Home
  • About
    • ABOUT KIRSTEN
    • WRITING & MEDIA
    • WORKSHOPS
    • PROFESSIONAL COUNSELING SERVICES
  • PREGNANCY
  • Parenting
  • RELATIONSHIPS
  • WELLNESS
    • ANXIETY
    • DEPRESSION
    • SELF CARE
  • CONTACT
    • WORKSHOPS
    • PROFESSIONAL COUNSELING SERVICES

Gluten-Free Mexican Chocolate Cupcakes :: Friday Foodie

January 30, 2015 By: babyproofedparentscomment

cupcake_chocolate

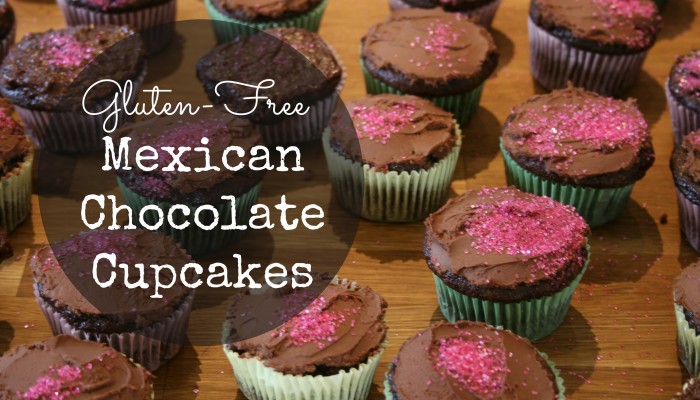
I have frosting issues. It’s always either too thin or too thick. I also enjoy waiting until a few minutes before party go time to start the actual frosting, which usually creates a crisis. In this case, it was too thick to spread, so I heated it, which made it a different color from the ones I had already done. My solution was allowing my little birthday girl to cover them with pink sprinkles. Pretty! Plus, it’s a cupcake! I appreciate the power cupcakes that look like famous people, but find that simple is often more tasty. This recipe is a variation of one I found on a great website: The Gluten Free Spouse, which is loaded with delicious ideas and great step by step photos. The consistency I get is a cross between a cupcake and fudge. I think that’s a lovely combination. I’ve cut back on the sugar and added some extra spice to give your mouth something new to contemplate, but omit the cinnamon and cayenne to get a basic, yummy treat.

Ingredients:

For the Cupcakes:

  • 1/2 cup gluten-free oat flour
  • 1/2 cup brown rice flour
  • 1/3 cup arrowroot flour (or cornstarch)
  • 1 teaspoon xanthan gum
  • 2 teaspoons baking powder
  • 1/4 teaspoon baking soda
  • 1/8 teaspoon salt
  • 1/2 teaspoon cinnamon
  • 1/4 teaspoon cayenne pepper
  • 3/4 cup cocoa
  • 1 & 1/4 cups sugar
  • 2 eggs
  • 3 tablespoons unsalted sweet cream butter (at room temperature)
  • 1 teaspoon pure vanilla extract
  • 1 cup buttermilk

For the Frosting:

  • 4 ounces cream cheese
  • 1 tablespoon butter (at room temperature)
  • 2 ounces unsweetened chocolate
  • 1 cup sifted powdered sugar

Technique:
Preheat your oven to 350 degrees. Line muffin tins with paper cupcake liners (you’ll need about 20, but don’t stress if your batter makes more or fewer). With an electric mixer, beat the butter and sugar on medium-medium high speed until well blended. Add the eggs and vanilla, and beat on medium until well blended. In a medium sized mixing bowl, use a whisk to combine all the remaining dry ingredients. 1. Add 1/3 of the buttermilk to the mixer, and beat until it’s incorporated and smooth, then add 1/3 of the dry ingredients, beat until incorporated and smooth. 2. Use a rubber spatula to scrape down the sides of your mixer bowl. Repeat steps 1 & 2 twice more, ending on the last of the dry ingredients.

When it’s all mixed up and looks smooth and delicious, scoop batter into the cupcake liners, filling them 2/3rds full. Bake them until a toothpick inserted into the middle of a cupcake comes out mostly clean (a few crumbs will stick, and it’s okay if they’re slightly undercooked – they’ll be like gooey brownies), about 20 minutes. Allow the cupcakes to cool on wire racks until they’re room temperature.

Meanwhile, make the frosting! Melt the chocolate over low heat in a small saucepan and allow it to cool. Combine the cream cheese and butter, beating them with your mixer until they’re smoothly blended. Add the chocolate, and beat until it’s incorporated and smooth. Gradually add the powdered sugar, about 1/4th cup at a time until it’s incorporated and smooth. Spread the frosting on your cupcake and then attack with pink sprinkles. Yum!

cupcake2

Cheryl’s Tips:
Mistakes are f’ing beautiful, and in many cases, delicious. If you botch a recipe, it means you put your own spin on the directions and got a different outcome. Which means you can’t be tamed. Which means you’re so pretty.

Here’s To Sanity and Cayenne Pepper,

Cheryl
5_MG_0872

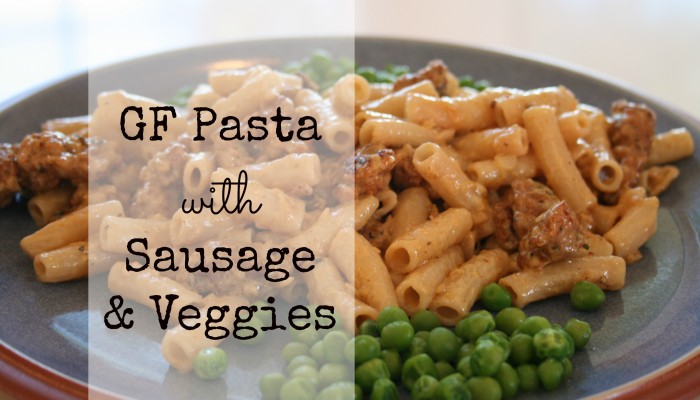
Gluten Free Ziti with Sausage & Veggies :: Friday Foodie

December 19, 2014 By: babyproofedparents2 Comments

gluten-free_pasta

Okay, glorious Readers.  I promised this recipe long ago, and most of you have been patiently waiting.  Others of you have been almost harassing in your repeated requests, comments, emails…settle DOWN, please.  This recipe tethers you to the stove for about 20 minutes, so plan accordingly, knowing the result will be scrumptious and well worth it.  Stove bondage creates a nice excuse for someone else to parent while you throw ingredients around and yell, “Blamblamblah!”  Sexy!  Lots of veggies (kale, spinach or broccoli) work for the hidden, nutritional puree in this recipe; if you have leftover braised collards, roasted Brussels sprouts or roasted cauliflower use one or a combination.

Ingredients:

  • 3/4 lb dried gluten free ziti
  • 1 T olive oil
  • 1/2 pound Italian Sausage (spicy or sweet)
  • 1/2 cup pureed prepared veggies (photo features a combo of brussels sprouts and cauliflower)
  • 1/4 cup marsala wine
  • 1/2 cup chicken stock
  • 2/3 cup heavy cream
  • 1/2 cup freshly grated parmesan cheese
  • kosher salt and freshly ground black pepper

Technique:

Follow your pasta package cooking instructions to prepare your ziti.  When you add the pasta to the boiling water, it’s time to start your sauce.  You’ll be stirring the pasta while executing the sauce steps.  It will all come out around the same time, rendering you a cooking genius.  Place a large skillet over medium high heat.  After a couple of minutes, add the olive oil.  When the oil is shimmery, add the sausage and cook, breaking it into small pieces with a wooden spoon.  When the sausage is browned, add the pureed veggies and sauté for 1 minute.  Add the marsala, and allow it to bubble and reduce for 30 seconds, then use the spoon to scrape all the brown yumminess from the bottom of the skillet.  Add the chicken stock, stirring to combine.  Allow the stock to simmer for about 3 minutes.  Stir in the cream, and simmer for about 3 minutes more, stirring occasionally, making sure to keep scraping up all the goodness from the bottom and
sides of the skillet.

By now your ziti should be ready.  Drain but don’t rinse it (the starchy water on the pasta will make the sauce cling more tightly), and add it to the skillet along with the cheese, 1/2 teaspoon kosher salt and a few grinds of black pepper.  Stir it all together over the heat until the cheese is melted and the whole skillet looks golden and perfect.  Dish it up and eat it up!

Cheryl’s Tips:

I’ve tried em’ all, and my favorite gluten free pasta is Tinkyada.  They have a huge variety (including lasagne sheets), and are easy to prepare.  The only drawback to gluten free pasta is that once cooked, it tends to be slightly fragile, but super yummy.  Kind of like some of my favorite people.  Taste your pasta before draining it; it’s perfect when it’s still a tiny bit firm, but not chewy or stick-to-your-teethy.  Cooking too much longer can make it squishy.

I learned this in a Thai cooking class.  Allowing your skillet to heat up for a couple of minutes before adding your oil allows the pan to expand, soaking in more of the oil, thus decreasing the chances that your food will stick or burn while cooking.  Magic!  No…Science!  No…Magical Science!

Let’s talk about aprons.  If you don’t own one, I suggest buying one at your first opportunity (it’s easy to find super cute and sexy 50’s style lines that will dress up your sweat pants) and wearing it habitually when you cook.  Working with fire and oil can make you instinctually curl slightly away from food prep.  You’re protecting your clothes and body from staining and burns, but the apron reduces the need for that.  Get close to that heat!  Less fear = more action = decadent food.  You may draw whatever life/psychological parallels you wish here, for there are many.

While you cook, listen to this.

Here’s To Sanity and Magical Science,

Cheryl

5_MG_0872

Gluten-Free Cinnamon-Sugar Muffins :: Friday Foodie

August 15, 2014 By: babyproofedparentscomment

GF Cinnamon Sugar MuffinThese fluffy muffins are vaguely reminiscent of the frozen cinnamon sugar donuts my mom occasionally baked and served up for breakfast.  The same company made “honey buns,” and when those hit the table, it was ON.  They probably contained glue, but hey, who’s keeping track?  When these gf delights are on the menu, we have a “one muffin at a time” rule, because like most humans, my littles like to eat the sweet caramelized tops, leaving the sad bottoms to crumble into oblivion.

Ingredients:

For the Muffins:
1 1/4 cups Pamela’s Pancake and Baking Mix
1/4 cup plain yogurt or kefir
1/4 cup milk or milk alternative
1 egg
1/3 cup honey
1 teaspoon pure vanilla extract
1/4 teaspoon ground nutmeg
1/2 teaspoon ground cinnamon
1/4 cup finely grated zucchini (optional)

For the Topping:
1/4 cup sugar
1 teaspoon ground cinnamon
2 tablespoons butter, melted

Technique:
Lightly grease a 6 cup muffin pan, and preheat your oven to 350 degrees.  In a medium mixing bowl, gently stir all of the muffin ingredients together just until blended (see our GF Orange Glazed Muffin recipe for the emotional ramifications of over-mixing).  Scoop the batter into the muffin pan, dividing it evenly between the six cups.  Bake the muffins for 18-20 minutes, until they’re lightly golden.  Remove them to a rack to cool slightly.  Meanwhile, mix the cinnamon and sugar in a small bowl until well blended.  Gently remove the still very warm muffins from the pan, and roll the muffin tops first in the melted butter, and then in the cinnamon sugar mixture.  I said “muffin tops”.

Cheryl’s Tips:

No tips on this recipe – it’s a cinch, and if they’re old enough, you can even enlist your kids’ help in rolling the warm muffins in the butter/cinnamon-sugar mixture.

You’re smart and pretty.  And don’t you forget it.

Here’s to Sanity and Muffin Tops,

Cheryl

5_MG_0872

Italian Spaghetti Squash :: Friday Foodie

July 31, 2014 By: babyproofedparents2 Comments

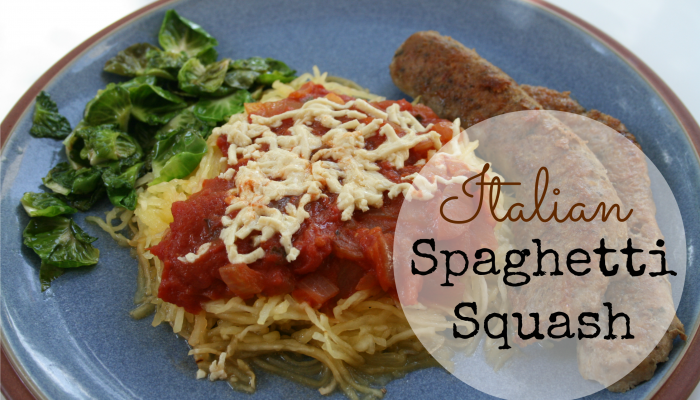
Italian Spaghetti Squash

Spaghetti squash is a magical vegetable.  The name says it all – when you roast and cut into it, the flesh divides into uniformly sized, al dente spaghetti “noodles”.  If you eat a paleo or gluten-free diet, finding layering base foods for sauces and proteins can be a challenge.  It’s easy to get bored with grilled chicken or steak with veggies, and spaghetti squash is your ticket to a new culinary ride.  I could be imagining this, but it seems the smaller the squash, the smaller the noodles.  I recently roasted a little guy (again with the veggie/male personification…what is that about?) that produced the squash equivalent of angel hair pasta.  This makes me want to squeeze Nature and exclaim, “You’re so CUTE when you’re not chaotically cataclysmic!”

Ingredients:

  • 2 lbs spaghetti squash (1 medium/large squash or 2 small)
  • 2 teaspoons chopped flat leaf parsley or basil
  • 1 tablespoon olive oil
  • 1 tablespoon kosher salt
  • 4 cups Fast Times Marinara or your favorite jarred pasta sauce (c’mon, make your own…you can do it!)
  • 2 cups shredded mozzarella or vegan cheese (see tip below for more on this)

Technique:
Start this recipe early in the day, baking the squash and making the sauce while you’re doing other stuff around the house.  This will allow cool down time, enabling you to work with it and add the other ingredients just before mealtime.  Preheat your oven to 350 degrees, wash the spaghetti squash, and pierce the skin all over (about 10 pokes) with the tip of a small knife to keep it from exploding while it roasts.  Place it on a foil-lined baking sheet, pop it in the oven, and roast for 45 minutes.  When it’s cooled down enough for you to handle, slice it in half length wise, and scoop out and discard the seeds and slimy strands from the middle.  Using a fork, dig into the squash, shred it into noodles and scoop it out into a large mixing bowl.  This is deeply satisfying.  Add the parsley or basil, olive oil and salt (use less if you’re sensitive.  I find that the squash has a slightly sweet flavor, and use extra salt to quell it, increasing savory compatibility) and use two spoons to toss it together.  (You can stop right here.  This makes a treat of a veggie side to go with any meal.)

Spread the seasoned squash in a lightly greased rectangular casserole dish, or if you’re feeling fancy, small individual serving casserole dishes.  Top it with the marinara, the cheese, and the protein of your choice (see ideas below).  Pop the casserole back into the oven and bake until the cheese melts and the whole deal is hot and bubbly, about 20-30 minutes.  The squash produces a lot of liquid, so use a slotted spatula to drain a little off as you serve it.  And then eat it.  And then smile.

Cheryl’s Tips:
Daiya vegan cheese is delicious.  It melts perfectly, and has a lovely cheesy flavor with no weirdo ingredients.  We try to avoid dairy, and this product has enabled us to make enchiladas, quesadillas, pizza, etc. without missing real cheese at all.  I buy 5 bags of our favorite (the mozzarella shreds) at a time, keeping one bag in the fridge and the rest in the freezer until I’m ready for them.

I photographed the squash alongside a link of chicken Italian sausage, casing removed, sliced lengthwise and cooked over medium heat until golden and cooked through (about 5 minutes per side).  Other protein adds: you can throw a handful of walnuts or some browned bison on top of the cheese before the final baking step.  I often add a fried egg to the baked squash with swoon-worthy results.  Also in the photo – I grilled Brussels sprouts and gathered up all the little leaves that fell off as I skewered them.  I sautéed the leaves in a skillet over medium-high heat in a teaspoon of olive oil until they were soft and browned, then sprinkled them with a little kosher salt.  Delightful.

If you listen to “Blow (Cirkut Remix)” by Ke$ha and take dance breaks with your kids while you’re cooking, your food will be infused with awesomeness.

Here’s to Sanity and Chaos,

Cheryl

5_MG_0872

GF Orange Glazed Muffins :: Friday Foodie

June 6, 2014 By: babyproofedparentscomment

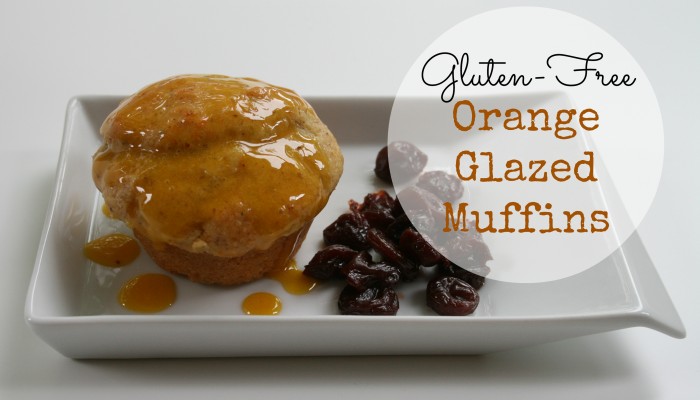
Orange_Muffin

There was no “Home Ec” in my high school.  There was, however, “Food Science and Nutrition,” or “FSN” to those in the biz.  We were sooo progressive.  In FSN, I learned all about the complex sensitivity of muffin batter.  If you over-mix it, the muffins can come out full of funky air tunnels.  While some people love to play “6 Degrees of Separation,” I prefer “Turn Everything Into a Mental & Emotional Health Promotional Opportunity.”  Let’s liken over-mixing the muffin batter to overanalyzing/doubting oneself when on the verge of making a major life change, such as embarking on a new career path.  If you question yourself too much, you can stay stuck, infusing your life with tunnels of stagnant air instead of consistently fluffy, magical deliciousness.  Bam!!

Make these easy, orange-tastic muffins with some scrambled eggs tomorrow morning, and watch your day unfold perfectly from there.

Ingredients:

For the Cherries:

  • 1 cup dried, sweetened sour cherries
  • 1/2 cup water

For the Glaze:

  • 2 tablespoons frozen organic orange juice concentrate
  • Up to 1 cup powdered sugar, sifted

For the Muffins:

  • 1 1/4 cups Pamela’s Pancake and Baking Mix
  • 1 egg
  • 1/4 cup plain yogurt or kefir
  • 1/4 cup milk or milk alternative
  • 1/2 cup honey or agave nectar
  • zest of one orange (another opportunity to use your awesome zester – hooray!)
  • 1 teaspoon pure vanilla extract
  • 1/4 cup finely grated zucchini (optional)

Technique

For the Cherries:
In a small saucepan, combine the cherries and water.  Bring to a boil over medium-high heat, stirring occasionally.  Reduce the heat to low and simmer until the cherries have softened and absorbed all but about 1/4th of the water.  Turn off the heat and allow to cool slightly. While cooling, the cherries will absorb a little more water, resulting in a yummy compote to spread over the muffins.

For the Glaze:
Start by whisking the frozen concentrate with 3 tablespoons of the powdered sugar.  The concentrate will melt quickly, and when the mixture is smooth, gradually whisk in the rest of the sugar until it’s slightly thicker.  These measurements make my favorite glaze consistency – it coats the muffins and drizzles onto the plate for dipping every bite.

For the Muffins:
Preheat your oven to 350 degrees.  Combine all the ingredients with a wooden spoon in a medium mixing bowl.  Gently stir until everything is incorporated and no streaks of baking mix or egg show up in the batter, but remember to avoid over-mixing it.  Scoop the batter into a well-greased 6-cup muffin pan, filling each cup to slightly below level.  Bake for 20 minutes or until very lightly browned.  Cool the muffins on a baking rack for about 5 minutes before carefully removing them from the pan, as gluten-free goodies have a tendency to stick.  Drizzle about a tablespoon of glaze over each warm muffin, serve with a small scoop of your lovely cherries, and enjoy!

Cheryl’s Tips:

If you’ve been following our recipes, thank you, and you might wonder why zucchini is in almost everything?  First, it grows like crazy here in Austin, so I try to find creative uses for it.  Second, it is incredibly easy to hide in baked goods and pasta sauces, adds a tiny bit of veggie goodness, and helps me feel less anxious about my children’s ongoing refusal to eat anything green.

I tried making the glaze with the juice of the orange, which seemed more practical, and in theory, tastier.  It fell flat.  The concentrate has such a powerful orange flavor, which is necessary to adequately compliment the milder flavor of the muffin itself.

Those cherries.  Mmmm.  Another decadent use: over frozen vanilla yogurt or a warm brownie.  The same stewing technique works well with other dried fruit, like apricots or plums.  I’ll save the Mental & Emotional Health/Stewing Promo for another time.

Here’s To Sanity and FSN,

Cheryl

5_MG_0872

Paleo Chocolate Chip Banana Bread :: Friday Foodie

April 25, 2014 By: babyproofedparentscomment

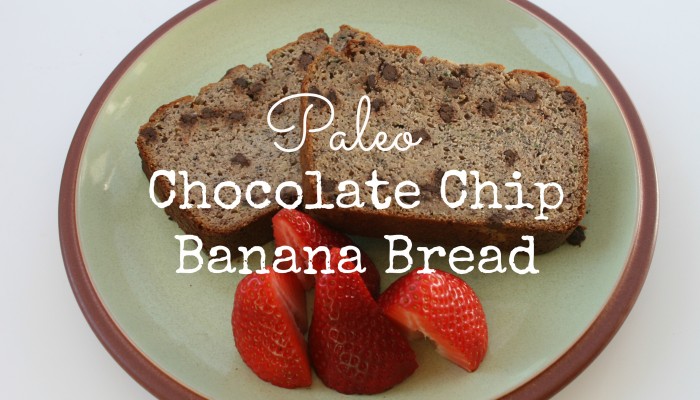
bananabread

This decadent, healthy bread hails from George Bryant, dynamic author of the website, Civilized Caveman Cooking.  Even if you’re not into eating a paleo diet, you’ve got to check out his site, where you’ll enjoy gorgeous photos and delicious, easy to execute recipes.  Plus, “Civilized Caveman.”  I need a minute.  Okaaaayyyy on with the recipe.  I’ve barely modified it by adding zucchini and chocolate chips, for the extra nutrients and yumminess.  Another delightful version omits the chocolate chips and adds chopped pecans, chopped pineapple and toasted coconut.  I love that a thick slice of this bread not only tastes amazing, but has everything you need for a complete meal:  veggie-based carbs, fat and protein.  It also freezes well, should you ever find yourself in an alternative universe with leftovers.

Ingredients:

  • 4 very ripe bananas, mashed
  • 1/2 cup finely grated zucchini
  • 1/2 cup almond butter
  • 4 tablespoons coconut oil, melted
  • 4 eggs
  • 1 teaspoon pure vanilla extract
  • 1/2 cup coconut flour
  • 1/4 teaspoon kosher salt
  • 1 teaspoon baking powder
  • 1 teaspoon baking soda
  • 1/2 cup Goodlife chocolate chunks or mini-chips (heavenly chocolate, without a bunch of crappy things you can’t pronounce)
  • Butter for greasing your loaf pan and spreading on the warm bread… mmmmm


Technique:

Preheat your oven to 350 degrees.  Using about 2 teaspoons of unsalted butter, grease a glass loaf pan (yes, glass, because metal pans get a little extra hot, making the crust too dark and the middle too doughy) very, very well, otherwise the bread will stick like glue, and you don’t want to miss a single bite.  (Mandy and her girls refer to pan stickage as “shrapnel.”  See my tips below to avoid this terribly unfortunate loss.)

In a medium bowl, use a hand mixer to blend the bananas, zucchini, almond butter, coconut oil, eggs and vanilla until smooth and creamy.  Add all of the remaining ingredients and mix until smooth and creamy again.  You needn’t worry about mixing speed or time once the batter is blended, as this is one of those rare baking adventures that doesn’t require precision; the bread won’t collapse on you or wind up full of holes. Scrape the batter into your loaf pan, and bake for 50 minutes.

Place a strip of foil loosely over the top of the loaf to avoid excessive browning, and bake 10-15 minutes more, until the bread looks evenly browned and doesn’t quiver when you tap the pan.  Allow it to cool in the pan on a rack for about 45 minutes before serving with more butter.  Dang!

Cheryl’s Tips:

I’ve tried a version with not-so-ripe bananas, which according to George makes little difference.  Perhaps I have a high-maintenance pallet, but it didn’t taste as sweet as the version with super ripe.  I’ve started buying way more bananas than we need, and when we get to the final four, tossing them in the fridge, where they’ll last at least a week.  They turn very brown, but when you peel them, they’re perfect and have a higher sugar content. (Preview:  start saving cut up extra-ripe bananas in your freezer for smoothies, a recipe that will blow your baby-lovin’ mind is coming soon.)

I am easily pleased by the obscure.  Examples:  the first squeeze (from the very middle) of a new tube of toothpaste, perfectly peeling a label off a new purchase without the tiniest spec of sticky left behind, and dislodging a loaf of bread leaving a crumb-free pan.  Somehow, these minor victories slightly balance chaos.  After the bread cools, run a knife carefully around the edges of the loaf several times.  Invert the pan onto a bread board and tap the bottom, allowing the loaf to slowly and elegantly fall out.  Enjoy this moment of perfection.

Here’s To Sanity and Cavemen,

Cheryl

5_MG_0872


Gluten-Free Lemon Ginger Scones :: Friday Foodie

February 20, 2014 By: babyproofedparentscomment

LemonScones

These sweet-tart-delightful scones are a mash-up between two of my favorite recipes: Elana Amsterdam’s basic scones (see her amazing gluten-free/paleo website:  http://www.elanaspantry.com), and my sweet friend Sara’s decadent lemon ginger scones.  They are perfectly enjoyed for breakfast or a mid-day snack, and the almond flour adds some healthy protein to the mix.

Ingredients:

The Scones:

  • 2 cups almond flour (sometimes called almond meal)
  • 3/4 teaspoon baking soda
  • 1/2 teaspoon ground ginger powder
  • 1 tablespoon minced fresh ginger
  • 1/4 cup chopped crystalized or candied ginger
  • zest of 2 lemons
  • 1 egg
  • 3 tablespoons agave nectar

The Glaze (optional, but mmmm):

  • 1/2 cup fresh lemon juice
  • 1 cup confectioners sugar

Technique:

The Scones:  Preheat your oven to 350 degrees.  Combine all ingredients except for the the egg and agave nectar in a medium mixing bowl.  In a separate small bowl, whisk the egg and agave nectar together, then mix into the dough, which will be chunky/lumpy and feel like sticky, heavy, gritty play-dough (I know, doesn’t  sound awesome yet).  No need to kneed, just mess with it with your hands or a non-stick spoon until it looks pretty consistent.  On a cookie sheet lined with parchment paper, use your hands to form the dough into a flat circle, about an inch thick.  Use a pizza cutter to slice the dough into 6-8 triangles, and gently move the triangles apart so they’re not touching.  Bake for 10 minutes, until the scones are light brown around the edges.  While they’re baking…

The Glaze: Whisk the lemon juice and confectioners sugar to form a glaze.  If you like thin glaze, you can add more juice, and more sugar will thicken it up like icing.  I used the measurements for my personal favorite consistency, which melts over the warm scones but doesn’t drip everywhere.

Let the baked scones cool for about 5 minutes, put them on a plate and drizzle the glaze over them.  Eat them right now!

Cheryl’s Tips:

Scones are fun to make, because they are very difficult to mess up (a major plus in my book, as baking is not my forte).  Don’t worry if they’re not pretty, because if they’re warm, they’ll be delicious.  Give me taste over aesthetic any day.

These are not only gluten-free, but paleo “friendly” – friendlier if you omit the ginger candy and glaze.  Stay tuned for more about the health advantages of eating gluten-free/paleo foods.  Almond flour is essentially very finely ground almonds – the stage immediately preceding almond butter. You can find it and all of the other ingredients for the scones at your local Whole Foods.

I love my citrus grater. Hold the grater firmly in your non-dominant hand, and your lemon/lime/orange in the other, then lightly rub all sides of the fruit against the grater over a bowl.  It does all the work for you, perfectly zesting the flavorful part of the rind and leaving the white part behind.  Be careful and don’t use too much pressure, as you don’t want to slip and get bodily zest in your food.

Here’s to strength, sanity and family-proofed meals.

Cheryl

5_MG_0872


Mandy’s Meatballs :: Friday Foodie

February 6, 2014 By: babyproofedparentscomment

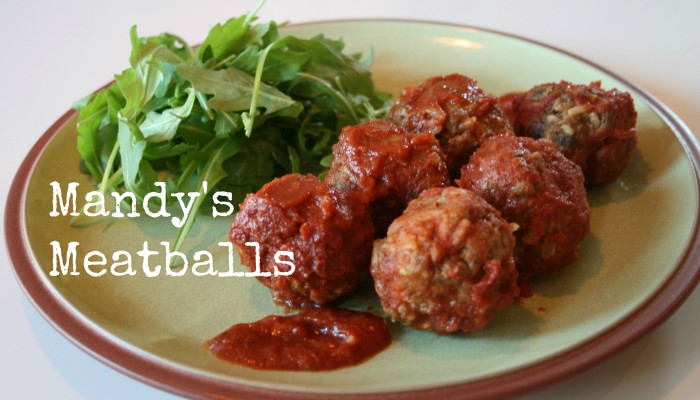
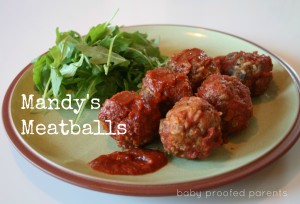
mandy meatballs

These delicious meatballs are adapted from a recipe that came from one of the coolest mamas we know (you’ll be hearing more from her down the road).  My favorite thing about this dish is that every savory bite is a perfectly nutritionally balanced… and as you’re gathering, we’re all about the balance.  Also, they freeze really well, so double up and save half for a night when you’d rather play than mess up the kitchen.

Ingredients:

  • 1 pound ground grass-fed beef or bison
  • 1/2 pound pork, chicken or turkey Italian sausage (spicy or sweet)
  • 1 cup steamed white or brown rice
  • 1/2 c finely chopped onion
  • 1/2 c finely grated zucchini
  • 1 teaspoon salt
  • 1/2 teaspoon black pepper
  • 1 teaspoon Spike Seasoning (optional)
  • 1 16 ounce can tomato sauce

Instructions:

Preheat oven to 350 degrees.  Mix all ingredients except for the tomato sauce.  Form into 1 inch balls, and place in a lightly greased casserole dish.  Drizzle the tomato sauce over the meatballs, and bake uncovered for 1 hour.  Stand in your kitchen, and breathe deep – they smell amazing and taste even bettah.

Cheryl’s Tips:

What’s Spike Seasoning?  The bomb.  A yummy, natural seasoning alternative to typical blends that use msg and other junk that’s hard to pronounce.  Look for it at your local health food store, or at http://spike-it-up.com/

Another kitchen tip:  Keep a box of surgical gloves handy (tee hee) for forming meatballs, deboning chicken, etc.  Keeps gunk out from under your gorgeous fingernails and makes clean-up easy.

Here’s to strength, sanity and really yummy meals.

Cheryl

5_MG_0872

Connect with BPP

Search The BPP Blog

Online resource for new and expectant parents

Welcome to BPP, an online resource for maintaining your sanity – before, during and after your baby's arrival. I'm Kirsten Brunner and I'm here to support YOU. Read more...

Parenting tips and advice
I'm Published by Mamalode!
TODAY.com Parenting Team Parenting Contributor

Tags

anger anxiety baby birth partner breakfast childbirth co-parenting communication conflict coparenting couple's communication crying dad depression dinner divorce doula easy recipe foodie friends gluten-free healthy hospital kid-friendly labor & delivery laughter love marital marriage newborn parenting postpartum pregnancy prenatal relationship sanity self care sides single parent strength stress stress mgt tantrums tip veggies

Learn About Our Professional Counseling Services

Learn About Our Professional Counseling Services

Pre-Order My Book

Pre-Order My Book

Our Partners

Our Partners

Recognition

Recognition
The Land of Nod, design for kids and people that used to be kids
Tiny Prints - Holiday Offer

For Parents of Multiples

How Do You Do It?

Monthly Archive

The Land of Nod, design for kids and people that used to be kids

Copyright © 2025 · Modern Blogger Pro Theme By, Pretty Darn Cute Design