baby proofed parents

where sane meets baby brain

Subscribe To The BPP Postcard

  • Home
  • About
    • ABOUT KIRSTEN
    • WRITING & MEDIA
    • WORKSHOPS
    • PROFESSIONAL COUNSELING SERVICES
  • PREGNANCY
  • Parenting
  • RELATIONSHIPS
  • WELLNESS
    • ANXIETY
    • DEPRESSION
    • SELF CARE
  • CONTACT
    • WORKSHOPS
    • PROFESSIONAL COUNSELING SERVICES

Mexican Hot Chocolate :: Friday Foodie

March 20, 2015 By: babyproofedparentscomment

Olivia

I love serving this easy to make hot chocolate, because of the reaction it gets. The cayenne doesn’t kick in fully until after a few sips. The heat makes the chocolate pop and the people say, “WHAT???!” and then “MORE!!!” Serve it with a roasted marshmallow and watch them decompensate. Maybe this is only fun when you’re a therapist, but try it anyway?

Ingredients:

  • 4 ounces milk chocolate, chopped
  • 4 ounces dark chocolate (85% dark if you can find it), chopped
  • 4 cups vanilla almond milk
  • 1/4 teaspoon cinnamon
  • 1/8 teaspoon cayenne pepper
  • marshmallows and/or whipped cream

Technique:
Melt the chopped chocolate in a medium saucepan over low heat. Add the cinnamon and cayenne. Gradually whisk in the milk, about 1/4 cup at a time, until the mixture is smooth and drinkable. Raise the heat to medium, and heat to almost a simmer, whisking occasionally. The idea is to get it nice and hot, without boiling it, which changes the consistency and flavor (not terrible, but not as yummy). Carefully pour the hot chocolate into four small mugs (or one giant one for yourself), top with a marshmallow and enjoy!

Cheryl’ Tips:
This is a great dessert on a cold night. I love how heat mixed with sweet can be such a surprise and so pleasing. Try that combo in your interactions with your partner. Satisfaction guaranteed.

Here’s to Sanity and Braces,

Cheryl

5_MG_0872

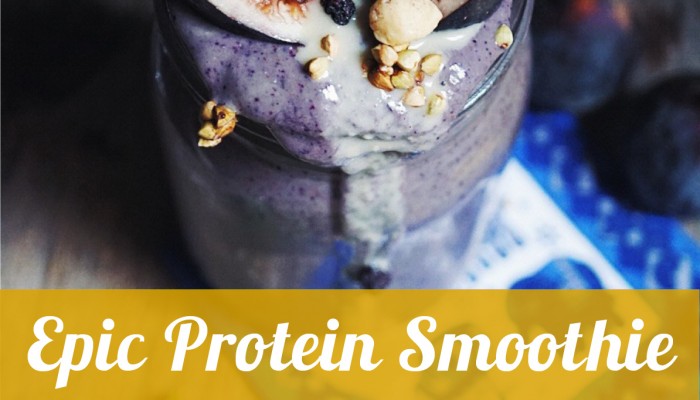
Epic Protein Smoothie :: Friday Foodie

January 17, 2015 By: babyproofedparentscomment

This tasty recipe comes straight from one of our favorite online vendors, Abe’s Market.  Abe’s is one of those fantastic finds that is ideal for busy parents. If you can’t get out of the house with your newborn or if you don’t have a Sprout’s, Whole Foods or Central Market in your neighborhood, Abe’s Market is the online store for you. They carry all of the gluten-free, organic, coconut-filled, a la naturale goodies and baby-products that you could ever want. We think they’re pretty awesome. We’re happy to say that this isn’t a sponsored post – we just wanted to share this great resource and their yummy smoothie recipe with you. Enjoy!

EpicProteinSmoothie_Social

Blueberry, Kale and Fig Protein Smoothie

Ingredients:

  • 2 handfuls of kale, fresh or frozen
  • 1/2 C of figs
  • 1/2 C of frozen blueberries
  • 1 frozen banana
  • 1.5 C coconut or almond milk
  • 1 Tbs hemp seeds
  • 1 Tbs tahini
  • 1 tsp cinnamon
  • 1 scoop protein powder

Instructions:

Place all ingredients in a blender and blend smooth. Feed to your kiddos and get excited that you are depositing healthy servings of veggies, fruits, fat and protein in their little bellies, all in one slurp.  ♥ C & K

Roasted Cauliflower :: Friday Foodie

November 7, 2014 By: babyproofedparentscomment

roasted_cauliflower-600x300

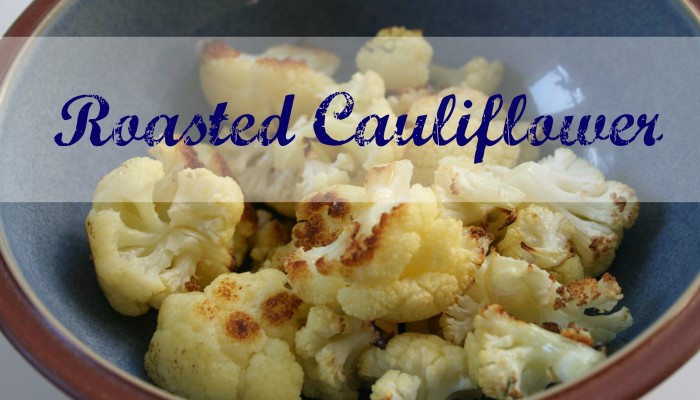
My early relationship with cauliflower was bleh.  I’d only eaten it raw, on a veggie tray with a big bowl of ranch dip.  The last lonely choice, after the carrots and celery were long gone, texture grainy, flavor odd.  The awkward, pale white girl alone in the corner of the dance hall.  Oops, we’re talking food, not my prom.  Fast forward years later to a night at my favorite Austin sushi joint, Uchi.  The wait is often insane, and always very well worth every second.  To appease hungry guests, Uchi serves little tastes from the kitchen.  A tray of simple golden-roasted, salty, olive-oily cauliflower came by, and I reluctantly popped a piece into my mouth.  Oh, wow.  Cauliflower?!  Sexy!  Who knew?  When roasted, the texture is silky, the flavor buttery and nutty.  I immediately worked to replicate the dish in my own kitchen, and think you’ll like the results.  I’ve served it to my kids, had them close their eyes and imagine popcorn, and they both ate one bite without gagging or spitting it out.  Victory!

Ingredients:

  • 1 bunch cauliflower
  • 2 tablespoons olive oil
  • 1 teaspoon kosher salt

Technique:

Preheat your oven to 450 degrees.  Using a small knife, remove the outer green leaves of the cauliflower bunch, and cut the white florets off of the stem.  Wash the florets, and drain/pat them dry with a clean dish towel.  Line a large rimmed baking sheet with aluminum foil, and spread the florets in a single layer over it.  Drizzle the florets with the olive oil, and roast them in the oven for 25 minutes.  The cauliflower will be covered with golden brown spots when it’s perfect.  Remove from the oven, and sprinkle the salt over the florets, scooping them around on the pan with a spatula to evenly coat them with the salt and olive oil.  Dig in!

Cheryl’s Tips:

I recommend doubling this recipe.  The leftovers reheat beautifully, and can be used again in a delightful pasta recipe.  Yeah.  That’s a teaser.  The delightful pasta recipe will be coming to you soon, on this very blog.  You just take a nice, deep breath… and wait for it.

Here’s to Sanity and Sushi,

Cheryl

5_MG_0872

Cinnamon Apples :: Friday Foodie

October 24, 2014 By: babyproofedparentscomment

Cinnamon Apples Plain

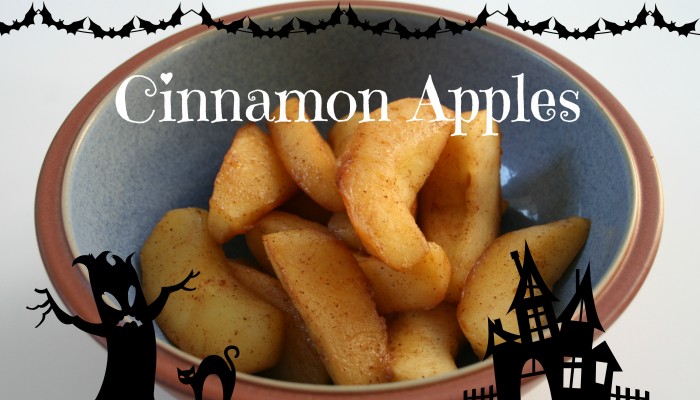
Although I took it for granted at the time, I was very lucky to have a mom who cooked most of our meals from scratch, with veggies from our backyard garden. The one downside:  since we very rarely ate them, things like fast food, frozen pizza and TV dinners became a delicacy for me.  To this day, you could give me the choice between boeuf bourguignon and a Totino’s Zesty Italiano Pizza, and I’d have to take a pause.  A long pause.  Another favorite was “Hungry Man” frozen dinners, with multiple foil course-compartments, each containing the perfect nutritional balance of processed materials, preservatives and glue.  Mmmm. One of those compartments was often filled by the yummiest, softest, cinnamon apples.  Here’s the super easy how-to for an infinitely healthier and delicious version, just in time for the fall arrival of Honey Crisp apples.  Double mmmm.  I am strangely hungry for Salisbury Steak n’ Peas.

Ingredients:

  • 4 Honey Crisp apples, cored, peeled and sliced (Granny Smith, Pink Lady and Fuji are also yummy)
  • 2 tablespoons butter
  • 1/2 teaspoon ground cinnamon
  • 1 tablespoon maple syrup

Technique:
Heat a large skillet over medium high.  Melt the butter in the skillet, and when it’s bubbly add the apple slices and cinnamon.  Sauté the apples until they begin to brown and soften, about 8-10 minutes.  Add the syrup and sauté 2-3 minutes longer and remove from the heat.  The apples should be tender-crisp, but not mushy at this point.  Allow them to cool for a few minutes and then dig in!

Cheryl’s Tips:
Leftover apples are great cold, topped with a little granola and a drizzle of heavy cream.  Let’s all give fall a big, fat hug.

Here’s To Sanity and Totino’s,

Cheryl

5_MG_0872

Gluten-Free Chicken Tenders :: Friday Foodie

October 10, 2014 By: babyproofedparentscomment

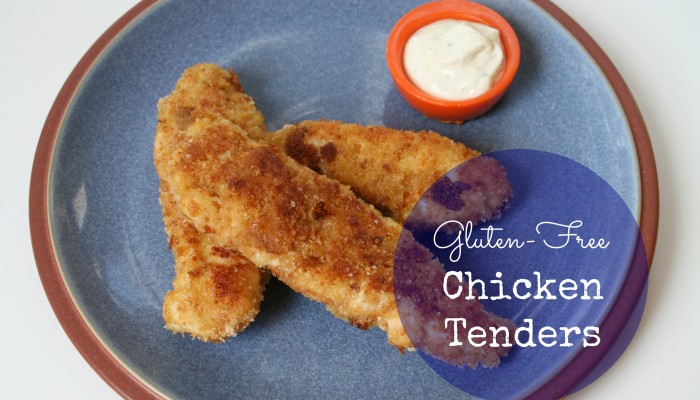
GF Chicken Tenders

The slow frying of these tenders is what makes them juicy and perfect.  If you cook them too quickly, the outside gets overly dark while the inside doesn’t fully cook through, resulting in burnt and chewy chicken.  Slow and low is counter to my preference of cooking too fast, too furiously… of doing many things too fast, too furiously.  Naturally, there’s a psychological parallel here.  Sometimes speed is the need – you have to act impulsively to keep life interesting and honor your gut, even at the risk of burnt, chewy crap.  But, making yourself sllloowwww down and catch a breath (ideally engaging your left brain) can make all the difference in quality.  All about balance, ya’ll. 

Ingredients:

  • 3 boneless, skinless chicken breast halves, cut into strips length-wise (about 4 strips per breast)
  • 1/2 cup white rice flour
  • 2 eggs
  • 3 slices gluten free sandwich bread, finely crumbled
  • kosher salt
  • 1/4 cup olive oil


Technique:

Grab three medium sized bowls.  Put the rice flour in one bowl.  In the second bowl, whisk the eggs until well beaten, and put the bread crumbs in the last bowl.  Place a large wire rack on your counter (over a couple of paper towels if you want to minimize the mess factor).  Line up your bowls, and get ready to dip.  One strip at a time, coat the chicken in first the rice flour, then the beaten egg, and then the breadcrumbs, carefully placing the strips on the wire rack to slightly dry.  This can get very gooey, so if you have them, use plastic gloves.  Don’t worry if you run out of one of your dipping elements, simply pause to crumble up more bread or throw in another beaten egg, until all of the chicken is coated.

Sprinkle the tenders generously with kosher salt.  In a large skillet, heat the olive oil over medium to medium low until it’s shimmering, but not smoking hot (like you are).  Carefully place the chicken strips in the oil (don’t crowd them, and know that you’ll probably have to cook at least 2 batches depending on the size of your skillet).  Fry the strips on the first side for about 5 minutes, and when they’re golden toasty brown, use tongs to flip them to the other side and cook about 3-4 minutes more.  Gently press your tongs against the tenders.  If they feel squishy, lower the heat to medium low and cook them a minute or two more.  When they feel firm and are golden all over, remove them to a clean wire rack and let them cool for about 5 minutes (this time allows them to cook a little longer with the residual heat).  Lovely.  Dig in!

Cheryl’s Tips:
I photographed the tenders alongside our garlic aioli, a delicious accompaniment.  The chicken tastes best the day it’s made, but you can reheat it by toasting in a 350 degree oven for about 7-10 minutes.  My favorite way to eat leftovers is chopped and added to a Cobb salad. 

Smile extra big as you eat this chicken, knowing you prepared it from 100% love and acceptance, unlike some chicken, at a certain chain restaurant.  Just sayin’. 

Here’s To Sanity and Slowing Your Roll,

Cheryl

5_MG_0872


Pumpkin French Toast :: Friday Foodie

September 26, 2014 By: babyproofedparentscomment

pumpkin french toast 2

Kirsten taught me this twist on a breakfast classic.  I love that it provides a healthy balance of protein, veggie-based carbs and fat.  Since it doesn’t require pre-soaking the bread or a long baking time, it’s not uncommon for me to quickly throw this together for dinner when I’m in a pinch, with zero complaints from the table.

Ingredients:

  • 8 slices thick-sliced, farm-style bread (the staler the better, use gluten free if you want to be extra healthy)
  • 1 large egg
  • 1/2 cup canned pumpkin
  • 1 t vanilla extract
  • 1/4 teaspoon cinnamon
  • 3/4 cup milk or alternative (my favorite is coconut milk)
  • 2 Tablespoons coconut oil for frying (butter or canola oil can also be used)
  • Maple syrup, honey or agave nectar for dipping (optional)

Technique: 

Heat skillet or griddle over medium.  Slice bread however you like (my kids like strips for dipping efficiency).  Whisk egg, pumpkin, vanilla and cinnamon in a shallow bowl until smooth and well blended, then gradually whisk in milk.  Melt coconut oil in skillet until shimmering.  Dip bread into pumpkin mixture and carefully add to skillet.  Cook about 1-2 minutes on both sides or until golden brown.  Serve, eat and swoon.

Cheryl

5_MG_0872


Val’s Spicy Turkey Chili :: Friday Foodie

September 12, 2014 By: babyproofedparents2 Comments

spicy turkey chili

I know it’s still sooo hot in Austin, but September means that fall, my favorite season for cooking and clothes, is around the corner.  Central Market has started stocking pumpkins, which makes me want to skip through the produce section.  So, I’m going to pretend fall is already here and share a nice hot recipe with you.  My friend Val is a great cook, and a badass.  That’s why this chili is so good.  I love how she and her husband James cook together.  They take a recipe, prepare it as written the first time, and after sampling it, they modify, modify, modify until it’s perfect.  And their version of perfection is so right. Enjoy with a cold IPA and pretend it’s not a 100 degree sauna outside.

Ingredients:

  • 1 tablespoon olive oil
  • 1 cup chopped onion
  • 2 cloves garlic, finely chopped (I have old recipes that refer to cloves as “buttons”, which makes me want to knit a vampire-retardant sweater with garlic buttons on it)
  • 1/2 cup chopped red bell pepper
  • 1 lb ground turkey breast
  • 1/4 cup chopped cilantro leaves
  • 1 bunch lacinato kale, stems removed and leaves coarsely chopped (optional)
  • 3 1/2 cups chicken stock
  • 1 cup beer (Pabst Blue Ribbon, or for a lighter flavor, and so you can still have beer left to drink after measuring the cup for the chili, Sapporo)
  • 2 tablespoons chili powder
  • 1 tablespoon kosher salt (less if you’re sensitive)
  • 1 teaspoon ground cumin
  • 1 small can diced green chilis
  • 1 14 1/2 oz can diced rotel tomatoes
  • 1 6 oz can tomato paste
  • 1 can refried black beans

Technique:

In a large dutch oven, heat the olive oil over medium high.  Add the onion and sauté until it’s transparent and softened.  Add the chopped garlic and continue cooking until the garlic is fragrant, about 1 minute.  Add the bell pepper and cook 2-3 minutes more.  Then add the turkey breast, and cook, breaking the meat apart with a wooden spoon, until it’s no longer pink.  Then you add everything else!  I love this part, dumping in a bunch of cans and seasonings and stirring until it’s all smooth.  Bring the chili to a boil, then reduce the heat and simmer over medium-low heat, stirring occasionally, for about 45 minutes to an hour, until the liquid reduces and it’s the perfect thickness.   I add the optional chopped kale to sneak in some veggies, and top with a little daiya cheese and Veggie Pirate’s Booty for my kids, and for me, a dollop of sour cream and some blistered shishitos for extra heat.

Cheryl’s Tips:

To prevent crying while chopping onions, put on a pair of sunglasses. Not only does it prevent your eyes from stinging/burning, it makes you look amazing in that ironic, “Too Cool for Others” way.  If you’re a child of the 80’s, you’re extra awesome, and you can sing this little diddy to the tune of Corey Hart’s “Sunglasses at Night”:  “I wear my sunglasses inside, so I can so I ca-an chop onions without tears in my eyes…”

Here’s to Sanity and Fall,

Cheryl

5_MG_0872

Gluten-Free Cinnamon-Sugar Muffins :: Friday Foodie

August 15, 2014 By: babyproofedparentscomment

GF Cinnamon Sugar MuffinThese fluffy muffins are vaguely reminiscent of the frozen cinnamon sugar donuts my mom occasionally baked and served up for breakfast.  The same company made “honey buns,” and when those hit the table, it was ON.  They probably contained glue, but hey, who’s keeping track?  When these gf delights are on the menu, we have a “one muffin at a time” rule, because like most humans, my littles like to eat the sweet caramelized tops, leaving the sad bottoms to crumble into oblivion.

Ingredients:

For the Muffins:
1 1/4 cups Pamela’s Pancake and Baking Mix
1/4 cup plain yogurt or kefir
1/4 cup milk or milk alternative
1 egg
1/3 cup honey
1 teaspoon pure vanilla extract
1/4 teaspoon ground nutmeg
1/2 teaspoon ground cinnamon
1/4 cup finely grated zucchini (optional)

For the Topping:
1/4 cup sugar
1 teaspoon ground cinnamon
2 tablespoons butter, melted

Technique:
Lightly grease a 6 cup muffin pan, and preheat your oven to 350 degrees.  In a medium mixing bowl, gently stir all of the muffin ingredients together just until blended (see our GF Orange Glazed Muffin recipe for the emotional ramifications of over-mixing).  Scoop the batter into the muffin pan, dividing it evenly between the six cups.  Bake the muffins for 18-20 minutes, until they’re lightly golden.  Remove them to a rack to cool slightly.  Meanwhile, mix the cinnamon and sugar in a small bowl until well blended.  Gently remove the still very warm muffins from the pan, and roll the muffin tops first in the melted butter, and then in the cinnamon sugar mixture.  I said “muffin tops”.

Cheryl’s Tips:

No tips on this recipe – it’s a cinch, and if they’re old enough, you can even enlist your kids’ help in rolling the warm muffins in the butter/cinnamon-sugar mixture.

You’re smart and pretty.  And don’t you forget it.

Here’s to Sanity and Muffin Tops,

Cheryl

5_MG_0872

Roasted Brussels Sprouts :: Friday Foodie

July 25, 2014 By: babyproofedparentscomment

Brussels Sprouts

I have a few grievances about the past.  I’m well on my way to letting go of most of them; you know, living in “the now” and all.  But one that is especially difficult to reconcile:  I’ve only been eating Brussels sprouts for a year.  As a kid, Brussels sprouts were the go-to vegetable for instant “ewww, gross” ignorance.  The veggie scapegoat – like the teenager who acts out and then gets all the blame for family-wide, rampant dysfunction.  All this time, sprouts were so deliciously perfect, and I never knew.  We have a lot of catching up to do.

Ingredients:

  • 1 bag or 1 “tree” Brussels sprouts
  • 2 tablespoons olive oil
  • 2 heaping teaspoons kosher salt
  • 1/2 teaspoon freshly ground black pepper
  • 1/4 teaspoon red chili flakes (optional – don’t use if your family has heat sensitivity)
  • 1/2 lemon

Technique:
Preheat your oven to 450 degrees.  Heat a tea kettle or microwave a large glass pitcher of water to boiling.  If you bought your sprouts still on the stalk or the “tree” as I like to call it, simply break them off.  Cut the larger sprouts in half, and leave the smaller ones whole.  Wash them, and place them in a metal colander in your sink. Pour the boiling water over the sprouts, and watch them go from camo to beautiful, bright green (this is an easy version of “blanching”, which is a preparation step for roasting dense vegetables – it makes a huge difference in the outcome).  Rinse them with cold tap water (this stops the impact of the hot water, preventing a heart-breaking mushy texture), and then dry them on a clean dish towel (this helps them brown evenly).  In a large bowl, stir the sprouts, olive oil, salt, pepper and chili flakes together.  Line a large, rimmed baking sheet with aluminum foil, and spread the sprouts evenly over the pan.  Roast in the oven for 25 minutes.  Remove from the oven, squeeze the lemon half over the sprouts and use a spatula to give them a good final stir.  Look at that.  Some of the sprouts will be dark, golden brown – those are the best.  The flavor of the little leaves that fell off the sprouts and almost got charred in the oven?  An angel was whittling a pegasus out of heaven-wood, and some shavings fell into your mouth.

Cheryl’s Tips:
Sprouts reheat deliciously.  If you have leftovers, grind them in your food processor, adding a 1/2 cup to pasta sauce for extra veggie-carbs.

Throw them on the grill to add a layer of smokiness – follow the recipe, but instead of using your oven, slide the prepared sprouts onto metal skewers (if you used the red chili flakes, wear gloves to avoid burning your fingers), and grill them over hot coals on one side for 3-4 minutes, then use tongs to flip them, grilling the other side for an another 3-4 minutes.  Don’t worry if they blacken a little – they’ll taste amazing.  Grilling produces a crunchier texture.  If you want them softer, move them to the edge of your grill off the direct heat of the coals, and let them cook about 5-10 minutes longer.  Don’t forget the lemon juice at the end.

Another tip?  Be kind to yourself in the kitchen.  Don’t say things like, “I suck at cooking,” because it’s not true and can become a self-fulfilling prophecy.  Remind yourself that the biggest reason you’re cooking is to improve health for yourself and your family, which is a form of love.  And love makes things taste so f’ing good.

Here’s To Sanity and Whittling,

Cheryl

Banana Nut Smoothie :: Friday Foodie

June 20, 2014 By: babyproofedparentscomment

smoothie2

Have you been saving overripe bananas in your freezer as instructed in our Paleo Banana Bread recipe post?  Good job.  In my recipe-writer fantasy, you’ve been waiting on the edge of your seat, gazing at least once a day at your growing frozen banana stash, scratching your head, gesturing with theatrical inquisition toward the ceiling and asking out loud, “WHEN is she going to give us that amazing smoothie recipe?!”  Beautiful, dedicated reader, your patience is about to be rewarded.  This smoothie cures what ails.  It makes a complete meal, is especially lovely for breakfast, and kiddos dig it.  Add the optional spinach leaves and protein powder to take the nutritional value over the top.  Sip, and levitate.

Ingredients:

  • 3 bananas, cut into chunks and frozen (freezing them makes all the difference)
  • 3 heaping tablespoons nut butter (my favorite is a combo of roasted almond butter and sunflower butter)
  • 1/2 cup plain yogurt or kefir
  • 1/2 cup milk or milk alternative (vanilla almond milk.  mmmm.)
  • 1 tablespoon whey protein (optional)
  • 1 cup loosely packed baby spinach leaves (optional)

Technique:
Put all that goodness into your blender and blend it well, baby.  My measurements result in about 4 small, very thick smoothies, the consistency of slightly melty soft serve.  If you like your smoothies more drinkable, simply add more milk.

Cheryl’s Tips:
Being raised by post-depression era farm folks conditioned me to feel physical pain when good food is thrown away.  I will trashcan dive if anyone tosses eggshells, apple peels, or anything that could be composted, and I love finding uses for dregs.  When you use fresh nut butter, you often have to stir and stir to combine the oil and nut solids.  At the bottom of the jar, there’s usually a thick, nutty layer that’s hard to spread without destroying your bread.  I scrape this out and toss it into the blender.  And on the rare occasion that there’s a leftover heel from a loaf of b-bread, it blends beautifully into the smoothie and gives it a tiny hint of chocolate.  Nothing wasted.  Your mouth will love the taste, your body will love the nourishment, and the part of your conscience that is in constant turmoil about the state of our environment will take a deeply satisfying breath.

Here’s To Sanity and Levitation,

Cheryl

5_MG_0872

Fast Times Marinara :: Friday Foodie

May 23, 2014 By: babyproofedparentscomment

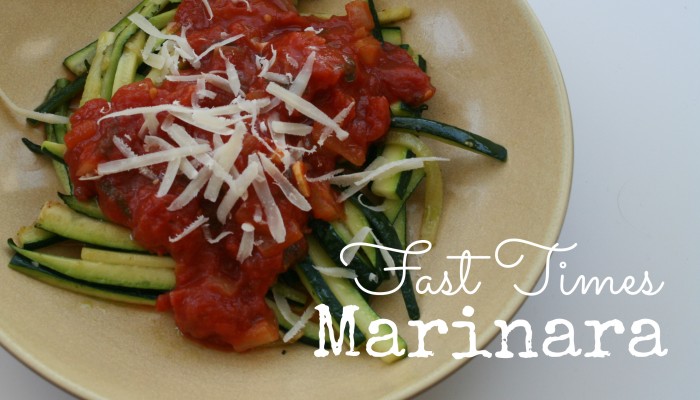
fast-marinara

No jar can beat you.  You are invincible.  Your marinara will make people laugh and cry and wonder who they really are.  I’ve had 2 cups of coffee.  This easy, vibrant sauce is a staple in my kitchen, and is worth the extra work to prepare from scratch.  Why?  Most pre-made pasta sauces have added sugar.  Get used to making your own, go back for a taste of pre-made, and you’ll detect the sweetness immediately.  I’d rather get my sugar from a cold IPA and a gigantic brownie topped with 85% dark chocolate ganache and a cherry-port reduction, wouldn’t you?  I’ve showcased the marinara’s beauty topped with grated parmesan over thinly sliced, sautéed zucchini.  It’s also perfect with pasta, spaghetti squash, or as a simmering sauce for halibut.  If you prefer a meaty sauce, add browned ground bison or Italian sausage.  I double the batch, freezing it up for future deliciousness.

Ingredients:

  • 2 tablespoons olive oil
  • 1 medium onion, chopped
  • 2 cloves fresh garlic, halved length-wise and thinly sliced
  • 2 28 ounce cans San Marzano Italian whole plum tomatoes
  • 1/2 cup loosely packed, chopped fresh flat Italian parsley or basil leaves
  • 2 teaspoons kosher salt

Technique:

Heat a large skillet over medium heat.  Add the olive oil, and when it’s shimmering, add the onion.  Breathe in that divine smell, and you’ll be shimmering too.  Sauté until the onion softens and is transparent.  Add the garlic and sauté about 3-5 minutes more.

(Want softer hands?  Before this next step, rub those hard-working beauties with some coconut oil and slip on a pair of surgical gloves.  To protect your skin, keep a box of gloves handy for preparing meat, peppers, or in this case, acidic foods.)

Pour in the juice from the tomato cans, then use your fingers to carefully break the tomatoes into pieces and drop them into the skillet.  Add the salt, and simmer the sauce for about 20 minutes, stirring occasionally until it’s thickened a bit.  Add the parsley or basil, and simmer about 5 minutes more.  Know what?  It’s ready.  Just like that.

Cheryl’s Tips:

I don’t have extra tips for this recipe, because it’s that simple and elegant.  I’ll use this space to tell you you’re doing an amazing job as a person.  If you’re reading this recipe, you at least have an interest in cooking, which is creative, which means you’re reaching for something beyond the ordinary, which makes me like you.

Here’s To Sanity and 85% Dark Chocolate,

Cheryl

Cheryl Sipkowski, MS, LPC

Gluten-Free Lemon Ginger Scones :: Friday Foodie

February 20, 2014 By: babyproofedparentscomment

LemonScones

These sweet-tart-delightful scones are a mash-up between two of my favorite recipes: Elana Amsterdam’s basic scones (see her amazing gluten-free/paleo website:  http://www.elanaspantry.com), and my sweet friend Sara’s decadent lemon ginger scones.  They are perfectly enjoyed for breakfast or a mid-day snack, and the almond flour adds some healthy protein to the mix.

Ingredients:

The Scones:

  • 2 cups almond flour (sometimes called almond meal)
  • 3/4 teaspoon baking soda
  • 1/2 teaspoon ground ginger powder
  • 1 tablespoon minced fresh ginger
  • 1/4 cup chopped crystalized or candied ginger
  • zest of 2 lemons
  • 1 egg
  • 3 tablespoons agave nectar

The Glaze (optional, but mmmm):

  • 1/2 cup fresh lemon juice
  • 1 cup confectioners sugar

Technique:

The Scones:  Preheat your oven to 350 degrees.  Combine all ingredients except for the the egg and agave nectar in a medium mixing bowl.  In a separate small bowl, whisk the egg and agave nectar together, then mix into the dough, which will be chunky/lumpy and feel like sticky, heavy, gritty play-dough (I know, doesn’t  sound awesome yet).  No need to kneed, just mess with it with your hands or a non-stick spoon until it looks pretty consistent.  On a cookie sheet lined with parchment paper, use your hands to form the dough into a flat circle, about an inch thick.  Use a pizza cutter to slice the dough into 6-8 triangles, and gently move the triangles apart so they’re not touching.  Bake for 10 minutes, until the scones are light brown around the edges.  While they’re baking…

The Glaze: Whisk the lemon juice and confectioners sugar to form a glaze.  If you like thin glaze, you can add more juice, and more sugar will thicken it up like icing.  I used the measurements for my personal favorite consistency, which melts over the warm scones but doesn’t drip everywhere.

Let the baked scones cool for about 5 minutes, put them on a plate and drizzle the glaze over them.  Eat them right now!

Cheryl’s Tips:

Scones are fun to make, because they are very difficult to mess up (a major plus in my book, as baking is not my forte).  Don’t worry if they’re not pretty, because if they’re warm, they’ll be delicious.  Give me taste over aesthetic any day.

These are not only gluten-free, but paleo “friendly” – friendlier if you omit the ginger candy and glaze.  Stay tuned for more about the health advantages of eating gluten-free/paleo foods.  Almond flour is essentially very finely ground almonds – the stage immediately preceding almond butter. You can find it and all of the other ingredients for the scones at your local Whole Foods.

I love my citrus grater. Hold the grater firmly in your non-dominant hand, and your lemon/lime/orange in the other, then lightly rub all sides of the fruit against the grater over a bowl.  It does all the work for you, perfectly zesting the flavorful part of the rind and leaving the white part behind.  Be careful and don’t use too much pressure, as you don’t want to slip and get bodily zest in your food.

Here’s to strength, sanity and family-proofed meals.

Cheryl

5_MG_0872


Mandy’s Meatballs :: Friday Foodie

February 6, 2014 By: babyproofedparentscomment

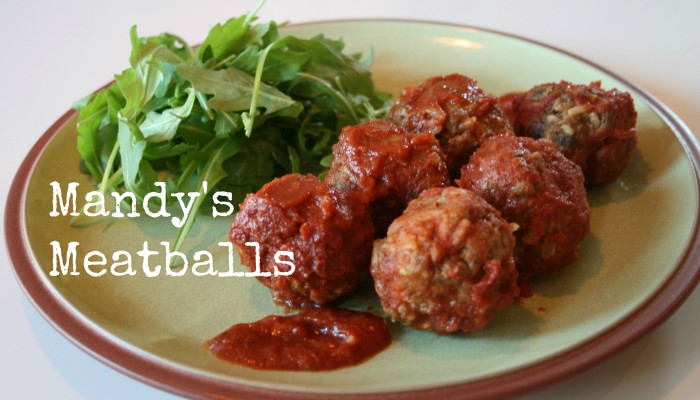
mandy meatballs

These delicious meatballs are adapted from a recipe that came from one of the coolest mamas we know (you’ll be hearing more from her down the road).  My favorite thing about this dish is that every savory bite is a perfectly nutritionally balanced… and as you’re gathering, we’re all about the balance.  Also, they freeze really well, so double up and save half for a night when you’d rather play than mess up the kitchen.

Ingredients:

  • 1 pound ground grass-fed beef or bison
  • 1/2 pound pork, chicken or turkey Italian sausage (spicy or sweet)
  • 1 cup steamed white or brown rice
  • 1/2 c finely chopped onion
  • 1/2 c finely grated zucchini
  • 1 teaspoon salt
  • 1/2 teaspoon black pepper
  • 1 teaspoon Spike Seasoning (optional)
  • 1 16 ounce can tomato sauce

Instructions:

Preheat oven to 350 degrees.  Mix all ingredients except for the tomato sauce.  Form into 1 inch balls, and place in a lightly greased casserole dish.  Drizzle the tomato sauce over the meatballs, and bake uncovered for 1 hour.  Stand in your kitchen, and breathe deep – they smell amazing and taste even bettah.

Cheryl’s Tips:

What’s Spike Seasoning?  The bomb.  A yummy, natural seasoning alternative to typical blends that use msg and other junk that’s hard to pronounce.  Look for it at your local health food store, or at http://spike-it-up.com/

Another kitchen tip:  Keep a box of surgical gloves handy (tee hee) for forming meatballs, deboning chicken, etc.  Keeps gunk out from under your gorgeous fingernails and makes clean-up easy.

Here’s to strength, sanity and really yummy meals.

Cheryl

5_MG_0872

Connect with BPP

Search The BPP Blog

Online resource for new and expectant parents

Welcome to BPP, an online resource for maintaining your sanity – before, during and after your baby's arrival. I'm Kirsten Brunner and I'm here to support YOU. Read more...

Parenting tips and advice
I'm Published by Mamalode!
TODAY.com Parenting Team Parenting Contributor

Tags

anger anxiety baby birth partner breakfast childbirth co-parenting communication conflict coparenting couple's communication crying dad depression dinner divorce doula easy recipe foodie friends gluten-free healthy hospital kid-friendly labor & delivery laughter love marital marriage newborn parenting postpartum pregnancy prenatal relationship sanity self care sides single parent strength stress stress mgt tantrums tip veggies

Learn About Our Professional Counseling Services

Learn About Our Professional Counseling Services

Pre-Order My Book

Pre-Order My Book

Our Partners

Our Partners

Recognition

Recognition
The Land of Nod, design for kids and people that used to be kids
Tiny Prints - Holiday Offer

For Parents of Multiples

How Do You Do It?

Monthly Archive

The Land of Nod, design for kids and people that used to be kids

Copyright © 2025 · Modern Blogger Pro Theme By, Pretty Darn Cute Design